Showing posts with label SFX. Show all posts

Monday, June 6, 2011

Final Exam

What seemed like the longest and hardest day of my life, is finally over and I can breathe a sigh of relief (after a well deserved strawberry martini I might add). Today was my practical final exam. Weeks of sculpting and pouring gelatin moulds are over, and today I was put to the test of creating my monster of a final. I am lucky enough to have a boyfriend that let me use his face and body as my guinea pig and transform him into what is my creepiest work yet. I wanted to create something that scared me. My inspiration came from what I think it's the scariest place - the deep sea. We know more about outter space than we do about the depths of our Earth's ocean, and that creeps me out. A great example of a terrifying underwater creature that I can't even believe actually exists is the Angler Fish. If you've watched Finding Nemo, you'll know what I'm talking about when I say "the scary fish with the light bulb on it's head". They look like this:


I can't even begin to describe all the hard work that was put into this special effects makeup, all I can say is we had from 9:30am - 3:30pm to complete it. I'd like to add, as a side project, my awesome cousin let me into his denturist lab and together we created a really cool set of custom teeth for my exam. They really pulled the whole look together and I am so grateful they turned out even better than I had expected. My boyfriend also helped me out with the light fixture, he even made it turn on and off. Talk about WOW factor!

Latex bald cap
 Light & wires running underneath latex prosthetic piece
Gelatin custom prosthetic face piece.
Airbrush & hand painted
Bottom fake teeth made with sculpy
Custom upper set character teeth


Behold, half Man half Angler fish

xox Celina

Saturday, May 14, 2011

Prosthetic Piece

I just realized how much work went into the movie Mrs. Doubtfire.

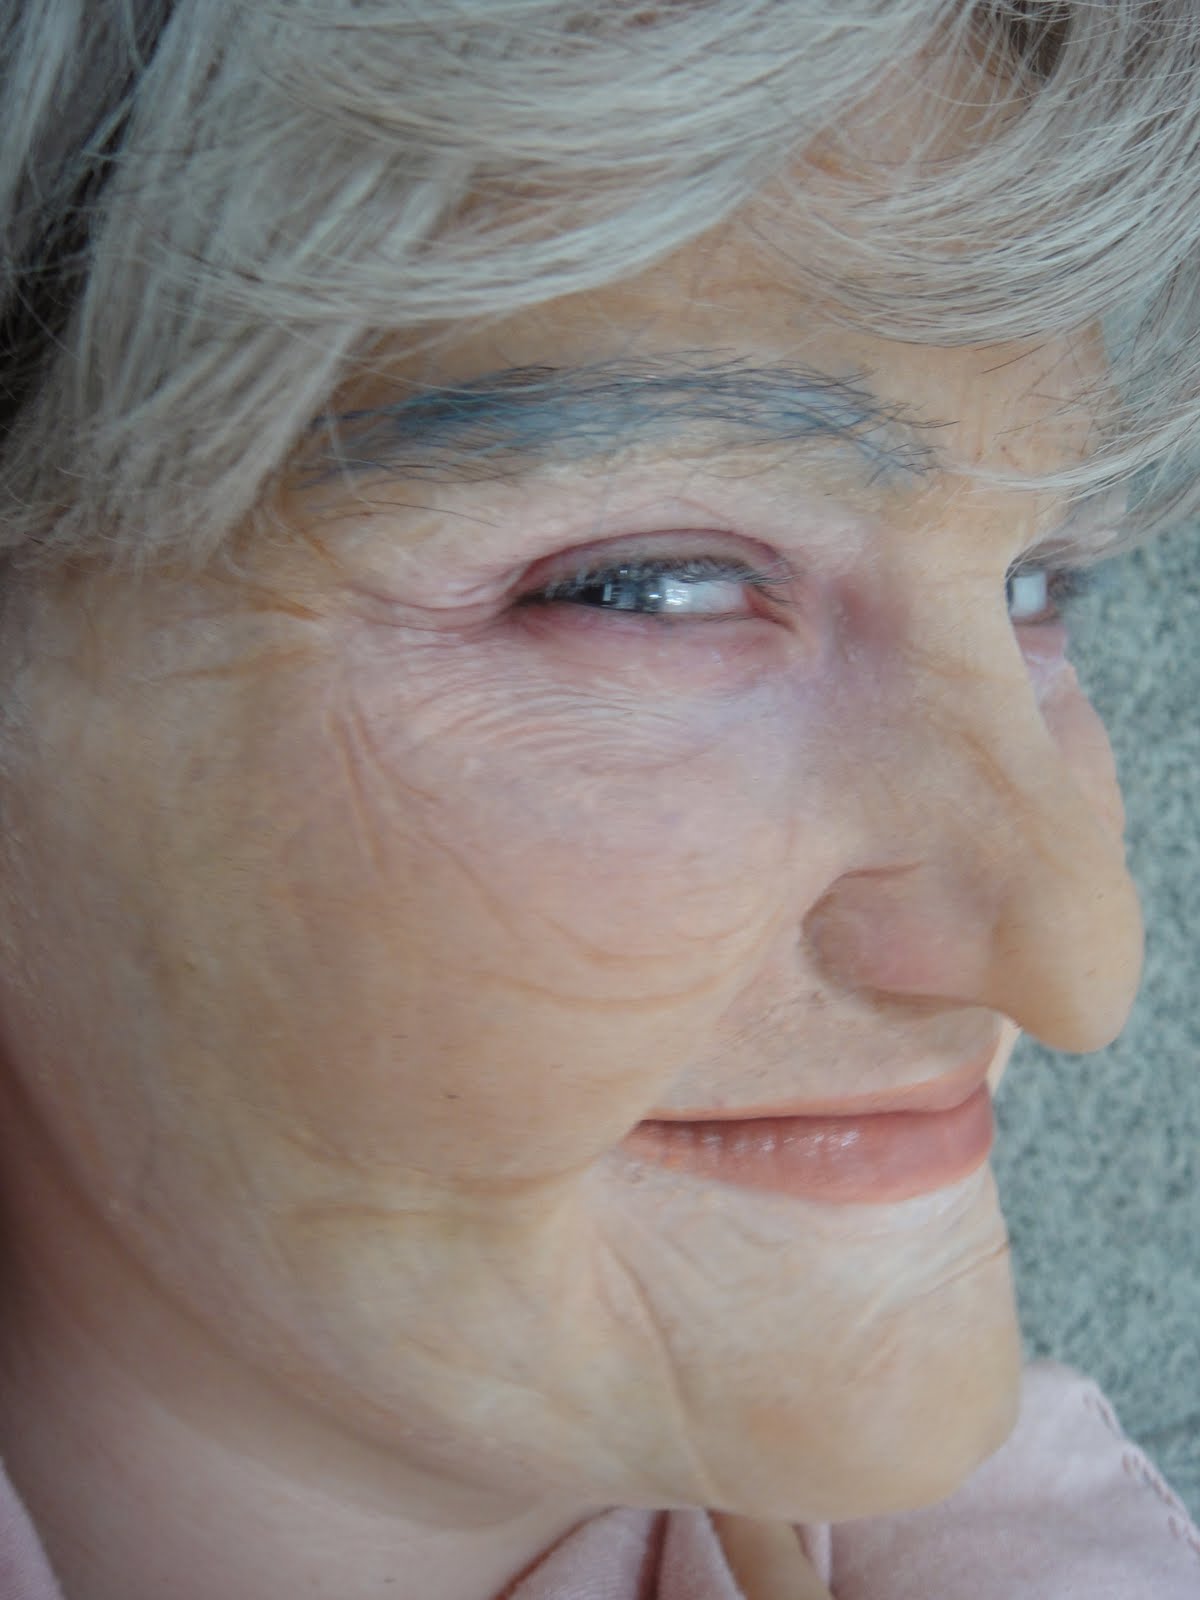
Over the past two weeks I have been working on an old age gelatin prosthetic piece. It all starts by Life Casting the person you are going to apply the piece to. This is Kelsey's face. We casted her face using alginate and plaster bandages. You lay still with your whole face covered, other than your nostrils so you can breathe. After it all sets (roughly 15-20 minutes on the face) you take it off and fill the casting with plaster, which gives you a solid impression of the face!

After pouring more plaster around the face mould (basically like a big plate around the face) you can begin sculpting your with clay which will look identical to how your piece turns out. Make sure to mark the hair line, because your piece can't go past it.


One you are happy with your clay sculpture, you create what is called "flashing" around it (so when you pour plaster on top, it will not stick to the face & plate, vaseline is used as the release), then plaster is poured over top, and once you crack open your two moulds, you now have a negative look at your sculpture.


Pour gelatin into this "bowl" of a face, lock your other face on top, and once that sets - you have your gelatin prosthetic piece.

Cut out the piece, apply it using pros-aid, witch hazel, bondo, latex, making sure to blend blend blend those edges!! Paint that piece up, add some eyebrows (I hand laid the eyebrows myself, using the same technique as when we laid beards) add a wig and check out my old lady Kelsey!


"Oh, sir. I saw it! Some angry member of the kitchen staff, Did you not tip them? Oh, the terrorists! They ran that way. It was a run-by fruiting. I'll get them sir. Don't worry." - Mrs Doubtfire
xox Celina

Saturday, April 23, 2011

Dirty Work

I have now officially entered the last term of my make-up artistry program. I am 2 months away from achieving my diploma, and it feels great! The last term is all about the lab work and making your own pieces for special effects. Here's the worlds quickest breakdown: we sculpt our own wounds out of clay, then use plaster to make them a mould, then use either latex or gelatin to create our prosthetic piece!

This is a plate mould that I created so I can scuplt my clay pieces on top of it:

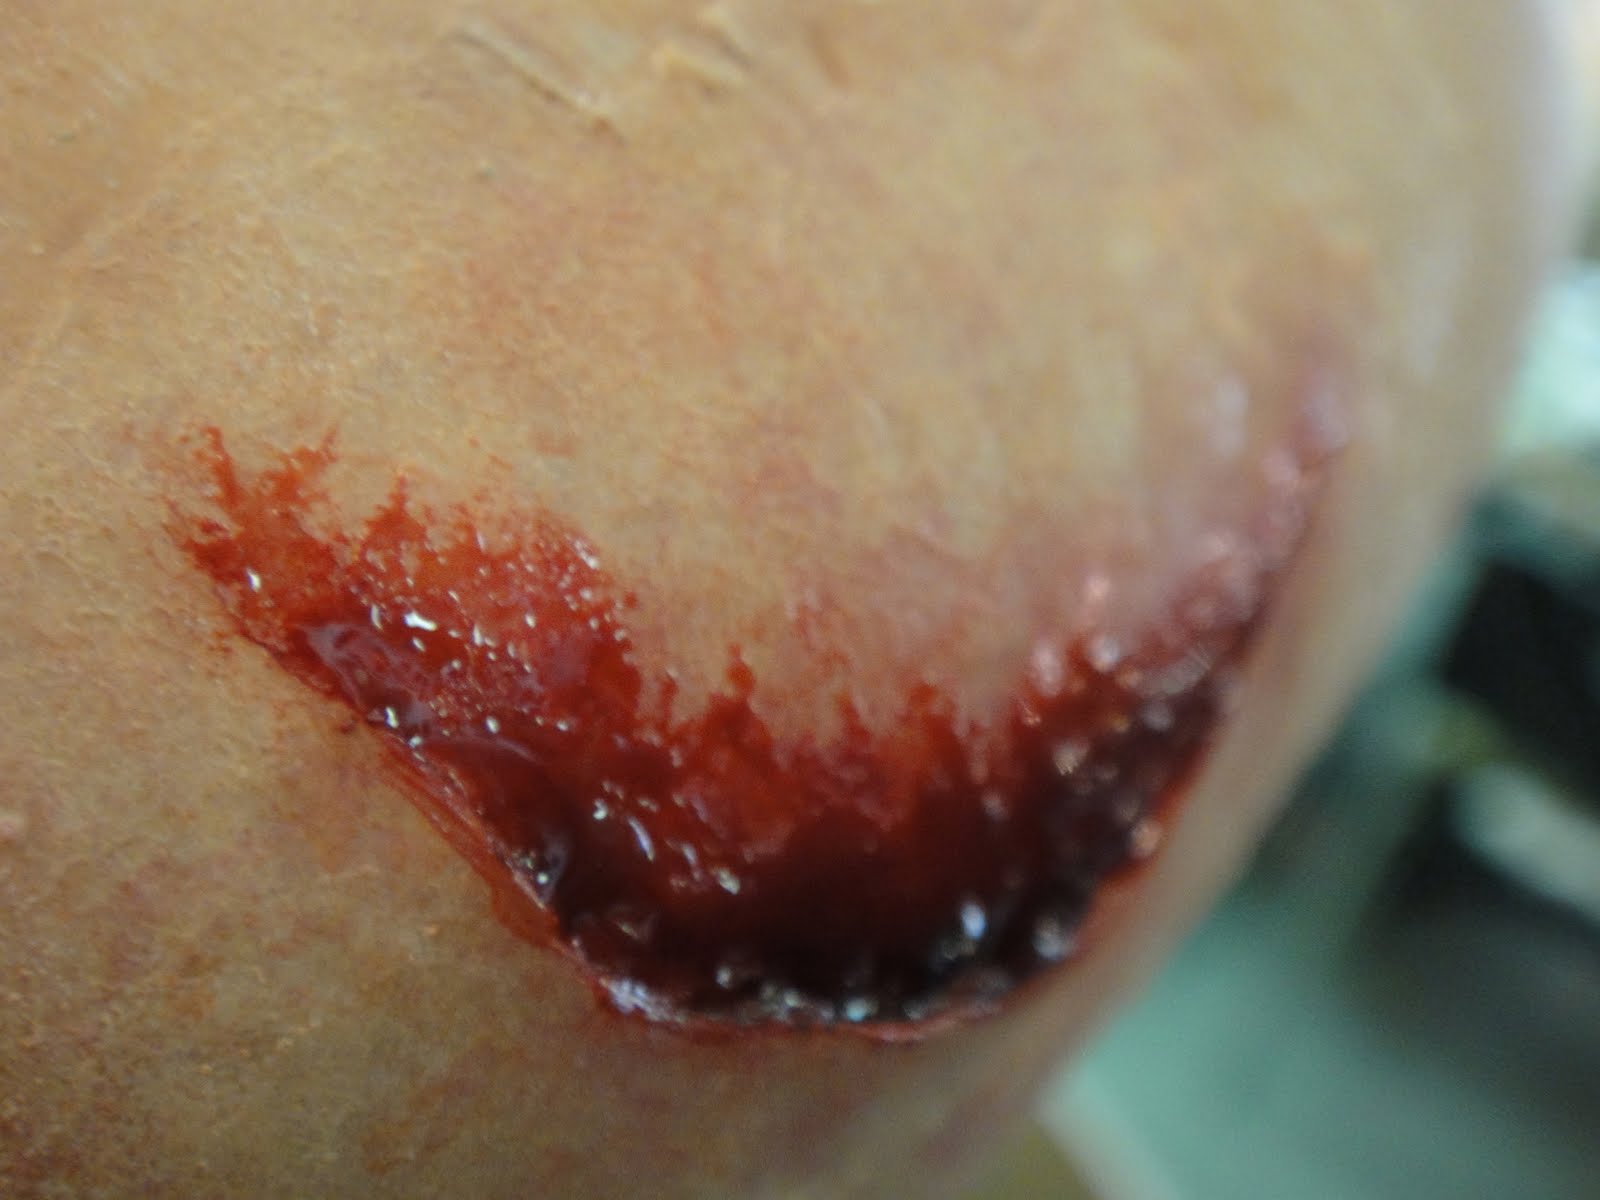
This is an example of a minor wound I sculpted:

And this is that same wound, that I made into a gelatin prosthetic piece, 
then applied & painted:
Pretty neat right? I thought so!

These next two are latex prosthetic pieces I made, applied & painted:
.


We also got to play around with our airbrushes again!

This is airbrush corpsing (sick!):

And this is airbrushed bruising:

 So much fun, but very dirty work. I can no longer wear my fancy clothes to school unless I want to destroy them. Pretty soon I'll start working on my final project which is a full body monster with a full face prosthetic piece, how exciting! Thanks for reading!

xox Celina

Saturday, April 9, 2011

Injuries Exam

 A Bad Day Golfing is Better Than A Good Day's Work!

On Thursday I had my 4th term final exam which was full body injuries. My model was my wonderful mother. It was some great mother-daughter bonding; Mom sitting there all nice, while I made her look terrible. How sweet. I had to create a full character analysis about what happened to her and why she was injured.

While on vacation in Florida, Michelle decided to spend her afternoon golfing while her husband spent the day at the men’s club. During the 5th hole, Michelle got hit in the head with a golfball when another golfer forgot to yell “Fore”. A rather large goose-egg resulted in the impact of the golf ball hitting her forehead. The Florida heat sunk in and Michelle’s skin felt the effects. A slight sunburn appears on her upper body – shoulders, cheeks and nose. 


Regardless, Michelle kept golfing. Unfortunately, being slightly off balance from the previous strike to the head, she took a tumble into the sand trap on the 10th hole while locating her ball. Her knees now covered in scrapes and dust, she stays strong and keeps golfing.


It was approximately 4pm in the afternoon when the weather took a turn for the worst. A storm appeared to be coming in the distance. As it moved closer and closer, Michelle still thought she had time to finish her last hole of golf. She was about to tee off on the 18th hole, holding her club, she was in the unlucky 10% of the population and was suddenly struck by lighting. The palms of her hands suffer from what look like electrical burns, and 1st degree burns up her arm from where the electrical voltage struck her. It looks like a branched pattern running up her forearms, with deeper burn marks in the crease of her arm bend where she was sweating. The heat of the electrical burn made her sweat turn to steam. 


Luckily, another golfer saw Michelle fall to the ground and called an ambulance. The paramedic then came to pick her up, and examine her injuries. 

Thanks for being such a great model, Mom!

xox Celina

Monday, April 4, 2011

Disco Disaster

Busting a move to ABBA just got that much more embarassing.
Today at school we had a great assignement: pick a decade & an accident.
I chose the 1970's, and what better injury than one on the dance floor!

Not only did I give my model Kelsey some wicked winged out blue eye shadow and big false lashes, but I also fanned out her hair like Farrah herself. I turned her in Disco Debbie who was in the wrong place on the dance floor when all of a sudden the disco ball detached from the ceiling and down it fell right on top of poor Disco Debbie's head. She survived the accident, but broke one of her platform shoes.


Ouch Deb! You're still a dancing queen, even with the scars.

xox Celina

Continuity

Have you ever watched a movie where something small keeps changing? For example, the mole on an actress' cheek keeps changing sides of her face periodically throughout the movie. Or an actor is holing a glass of water in their right hand and then in the next shot it's in their left hand? 

Doesn't that drive you crazy?!! Maybe you are just lucky and you get so drawn into films that you don't notice these things.

Contiuity in a movie is very important, especially in the make-up department. If someone is injured in one scene and then the director needs to go back and re-shoot a part of that scene at a different time, their make-up and special effects have to look exactly the same as it did the first time.


This continuity test was done on location in the park in Gastown.
I used gelatin and tissue, as well as alcohol-based paints.


As for this one, I used gelatin, pros-aid, alcohol-based and cream-based paints.

Is it just me, or am I seein' double ;)

xox Celina

Tuesday, March 29, 2011

Bald Babes

Ever wondered what you'd look like without hair? I don't anymore. I never want to go bald, not only would I look like my dad, but I love hair so much I'd wear wigs if I had to.
I did enjoy making some other people look bald though. I've shaved pleantly of heads in my day, but only twice have I applied bald caps. 

Applying a bald cap is not easy. First, you have to prep their hair. If your model has long hair, wrap it up into a bun on the back of there head (the higher the better, but flat - not a cone). Use Gafquat (basically super glue in hair gel form, washes out with water) to get more working space behind the ears. Put on the cap and start applying! We used adhesive called Pros-Aid which is medical grade adhesive, latex, and bondo. The cap has to be tight and the edges blended completely. I used Grease Paints and Pax Paints (Pros-Aid based) to paint skin tone, and even stippled on fake hair stubble!


Rubber Bald Cap
Latex Bald Cap


Bald Boyfriend
When I first met Martin he had a shaved head, 
so I think he looks just as cute with or without hair.


Aaaannnddd then we found a room full of mannequins.
What hairless fun!

xox Celina

Thursday, March 24, 2011

a Hairy situation

I can't believe I'm doing this but, to quote Ke$ha "I like your beard"

Facial hair is one of the most challenging things I have done so far. It is tedious work that gets EVERYWHERE. There are different types of hair you can buy (I used crepe wool hair) and I blended this hair (for like 8 hours) to come up with 3 different shades for a realistic beard. 
After a long process of the stickiest skin glue ever (spirit gum) and cutting and laying fake hair onto my models face, voila! There's the beard. 

Lookin' pretty manly & also a little like a hobo.


Then I gave that long homeless beard a nice little cut for a more sophisticated look.
Uhh.. or rock band groupie look. Whichever you prefer to call it.


Unlike laying your own beards, pre-made pieces are super fast & very easy. If your budget can handle it, a pre-made piece is the way to go. Not only will it save time, but it will also help for continuity if needed in a film.

Anyone for a mustache ride?


I chose this picture because you can see me taking the photo & my instuctor Tracy in the glasses reflection. How cute!

xox Celina

Shingled Liz

Hey! Have you ever had the chickenpox? Most likely. But have you ever had the more extreme case of chicken pox called SHINGLES?? It would be rare unless you were a baby, or very old, or already had some sort of disease. But if you ever do have shingles, I know exactly what they would look like...

I am really lucky to have such nice friends that willingly come to my school so I can make them look really sick. This is Liz. Other than her occasional overdose of cookies and tea, Liz is completely healthy.. Until she came to me!! I gave Liz a terrible case of shingles. So bad that she scratched them open, touched her eye and infected herself pretty bad.


This is a down right nasty close up of some shingles.

created with wax, gelatin, latex & alcohol based paints

Poor, poor Liz. The bluest of eyes. The reddest of sores.


Keep healthy, folks!
ps. Thanks Liz. You look fab!

xox Celina

Burn, Baby Burn

If you have a weak stomach, you may not want to look at this post. I will tell you, it is all make-up (psst... I did it myself) however it is supposed to look real! But don't worry, no harm was done during the makings of these disgusting special effects make-up for film. 

This is a chemical burn. Imagine a nice young girl working at McDonalds, accidently dropping her ring into the deep frier, and reaching in the get it back.... yikes!

created with gelatin
& alcohol based paints
  
This is a 3rd (sometimes even called a 4th!) degree burn. 
An electircal burn. Don't grab on to any high voltage wires!


created with gelatin & latex
alcohol based paints & stage blood 

Another one bites the dust! Stayed out working in the very cold weather conditions for too long. Those fingers are long gone to frostbite!!

created with wax & latex
cream based & alcohol based paints
zice (fake snow)

Bet you didn't realize how precious your hands were until you read this! Stay safe kids!

xox Celina

Friday, March 4, 2011

SFX

Oh my gosh this school year is flying by! I am already in my 4th term out of 5! How crazy is that? Feels like I just started. But I couldn't be happier. 
It's exciting that I will soon have my Diploma in Make-Up Artistry in my beautiful well manicured artist hand. Then the world of ugly can bow down before me as I make everyone beautiful. ... okay back to reality, being a make-up artist doesn't necessarily mean you make things pretty. The last couple classes I have wanted to throw up in my mouth several times when I realize what I am about to do. It's not even disgusting yet, we are only just starting special effects. I hope my stomach can handle it...

So far, I've mastered giving my classmates black eyes and broken noses.


Aging someone with liquid latex. 
(really cool effect. really annoying to remove!)


And the cherry on top
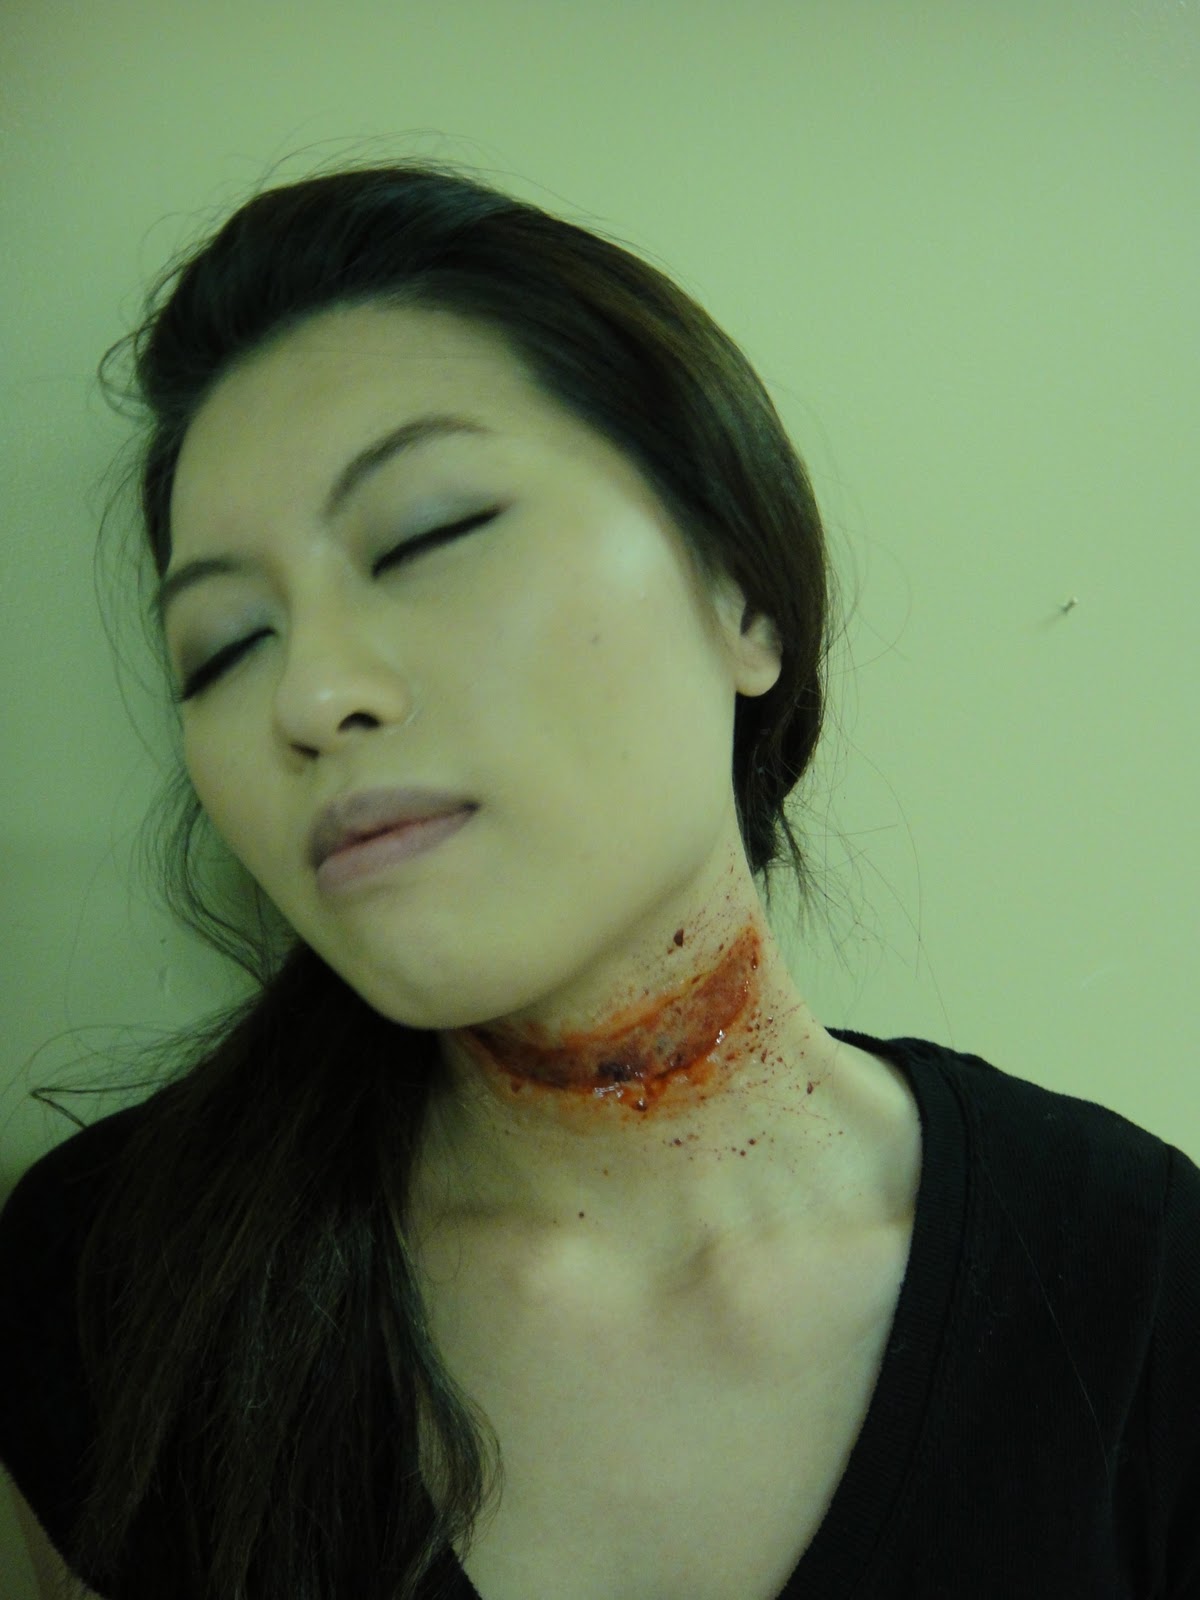
... slitting someone's throat!


This is the grossest thing I have done to date. BLUHG!


Hope I didn't make any of you unwillingly throw up on your keyboard! 
More gore to come!

xox Celina